Using Typescript in Vanilla JS projects
Full-stack Javascript developer mostly working for tech startups.
I enjoy making the complex simple, love the outdoors and recently discovered open water swimming.
So much of Javascript is about tooling these days - and frontend development largely revolves around frameworks such as VueJS or React. It's not always easy to find examples of how to use build tools without complex framework setups. So I'd like to share with you my simple Typescript setup for Vanilla JS projects.
Setup Overview
In my experimental personal projects l like to keep things simple. They largely consist of a single HTML file, a few Javascript module files, and a stylesheet. There is no need for bundled production builds, pre-processors, post-processors, minifying or any of the other great features that come with modern frontend build tools such as Babel, Webpack or Vite.
What I do value however is Typescript support, and a setup that allows me to easily write and run unit tests. This makes for a smoother developer experience and allows me to use best practice without digging deep into complex tooling.
Build Tools
For my minimal setup I need two build tools:
- typescript - for Typescript compilation
- jest - for Jest unit tests
To offer good Typescript support during unit testing I also use these two additional packages:
- ts-jest - allows Jest to test source code written in Typescript
- @types/jest - provides Typescript types for Jest unit tests
Here are the command line arguments to start the project:
npm init
npm install -D typescript
npm install -D jest
npm install -D ts-jest
npm install -D @types/jest
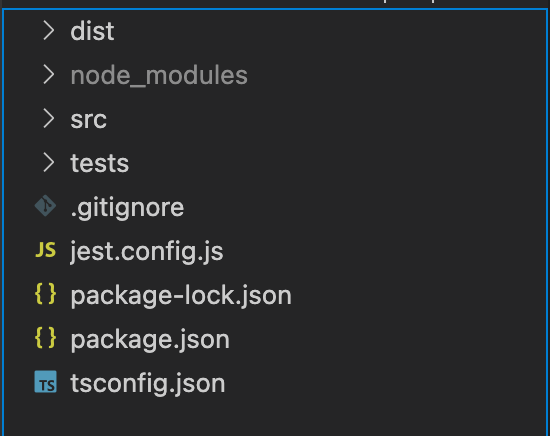
Folder Structure
The folder structure for such projects is straightforward:
- a
distfolder that holds the final production build (more on this below) - a
srcfolder that holds the source files - a
testsfolder that holds the unit tests - the project's root folder holds the package.json files, typescript config files and jest config file
Folder structure
mkdir dist src tests
Typescript Config
The Typescript configuration file is as follows:
tsconfig.json
{
    "compilerOptions": {
      "target": "ES6",
      "module": "esnext",
      "moduleResolution": "node",
      "noImplicitAny": true,
      "removeComments": true,
      "preserveConstEnums": true,
      "sourceMap": false,
      "outDir": "dist"
    },
    "include": ["src/**/*"]
}
The main points to note here are:
- The
moduleResolutionvalue ensures that jest modules are correctly resolved. - The
outDirvalue points to thedistfolder.
Jest Config
The Jest configuration file is as follows:
jest.config.js
/** @type {import('ts-jest/dist/types').InitialOptionsTsJest} */
module.exports = {
  preset: "ts-jest",
  testEnvironment: "node",
  roots: ["tests"],
  globals: {
    "ts-jest": {
      diagnostics: {
        ignoreCodes: ["TS151001"],
      },
    },
  },
};
The main points to note here are:
- the initial type declaration that pulls types from the
ts-jestpackage - the
rootsentry that points Jest at thetestssubfolder - the 'diagnostics' entry prevents a warning about potential module import problems
Package run scripts
The following scripts inside package.json complete the setup:
package.json
"scripts": {
    "test": "jest",
    "dev": "tsc --watch",
    "build": "tsc"
  }
And to get started, just run the dev script in your terminal. This will start the Typescript compiler in watch mode, with live recompiles whenever you change your source code.
npm run dev
Skeleton HTML and Javascript files
To bring it all together I create a skeleton Javascript file inside the src subfolder. This will be the main entry point for the application.
src/index.ts
console.log("hello world");
The Typescript setup means that this file will be compiled into dist/index.js.
To use this compiled Javascript file, I include a bare-bones index.html file in the dist folder:
dist/index.html
<html>
  <head>
    <script type="module" src="./index.js"></script>
  </head>
  <body>
  </body>
</html>
The important thing to note here is the type="module" identifier. This allows you to use module imports within your index Javascript file. You can separate source code into modules that are easy to maintain and easy to unit test.
In practice in smaller projects I end up with a single module file. It's still worth the extra step to allow unit testing of individual functions within your code.
You can then open the index.html file in your browser. Provided you don't have other external dependencies you won't even need to start a local web server - just start the file under the file protocol.
Typescript type definitions
So where do Typescript type definitions go in this setup? The simplest way I've found is to create a types.ts module file inside the src folder. You can then import types from here in your other source code files and your unit tests.
Here is an example file. These interfaces can be imported in the rest of your code and in your unit tests.
src/types.ts
export interface Person {
  name: string;
  age: number;
}

export interface Settings {
  offset: number;
  margin: number;
}
Whole project setup
Here is an overview of the entire setup.
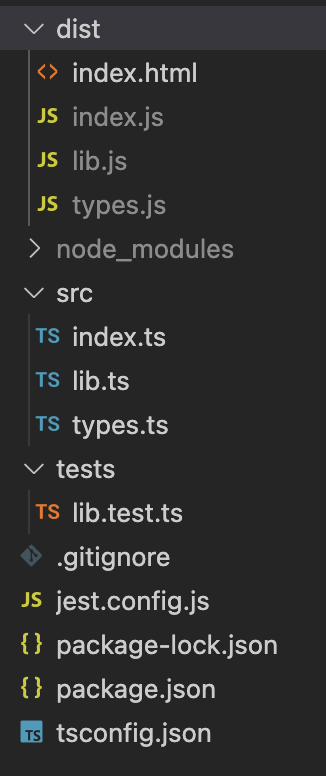
- The
distfolder contains the skeletonindex.htmlfile and the compiled JS files - The
srcfolder contains theindex.jsentry-point JS file, in addition to one or more library module files, and, if you like, a centraltypes.tstype definition file - The
testsfolder contains jest unit tests
Conclusion
This is the end of my barebones Javascript setup. I've found it to be strong enough for personal experiments and for smaller commercial projects where a framework is not required.
I'd love to hear your thoughts and feedback. Let me know what your favourite tools are in the comments!
